Effectively managing the lifecycle of every product you create is challenging—but the right tools can carry a lot of the burden for you. Implementing Windchill, a robust product lifecycle management (PLM) solution, gives your team a central repository for all product information from drawings and CAD files to instructional documentation and more. Add in Windchill’s advanced capabilities, and you can easily maintain and update that information through product releases, promotions, changes, and more. Here’s an overview of some of the most useful Windchill change management workflow capabilities.
Windchill Change Management Basics
Before we can dig into the details of Windchill change management, we have to review some basics.
Lifecycle States
Lifecycle states indicate where parts and products are within the lifecycle process and whether or not changes can be made. Associated advanced controls/permissions help to automate workflow tasks in accordance with assigned roles. The lifecycle states are as follows:
- In work: Object is still open to changes
- Released: Object is only available as read or download; changes cannot be made, and checkout function capabilities are disabled
- Obsolete: Object is no longer in use; admins can choose to hide obsolete objects or keep them available as references
- Under review: Automatic state when a part is moving through a workflow
Team Membership Roles
Users are assigned roles that are used to automate the assignment of tasks through any designated workflow. These roles, tasks, and workflows can be fully customized for your specific Windchill instance. Some examples of roles include:
- Change admin
- Design engineer
- Product manager
- Promotion approver
Managing Tasks
The Windchill homepage is highly customizable, so each user can set it up in a way that works best for them. We recommend including tasks on homepages so each team member can easily see what work is assigned to them.
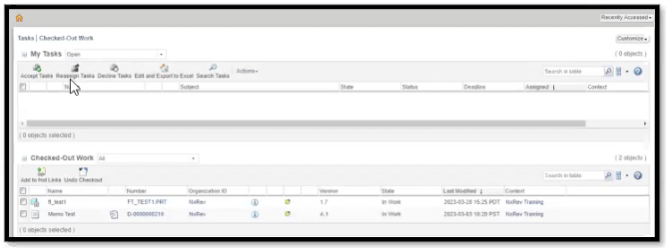
In addition to tasks, the homepage can include the following, which can be rearranged using drag and drop:
- Updates
- Checked out work
- Packages
- Workspace
- Meetings
- Notebook
- Subscriptions
- Reports
- Saved reports data
- Data monitors
- Discussions
- Actions
Then, we put all of these parts together into . . .
Windchill Change Management Tutorials
Creating Objects in Windchill
To move objects through the product lifecycle, they have to be properly set up within Windchill. The process goes as follows:
- Create an object (for the sake of the tutorial, we’ll call this OBJ 1)
- OBJ 1 gets saved locally (not within Windchill)
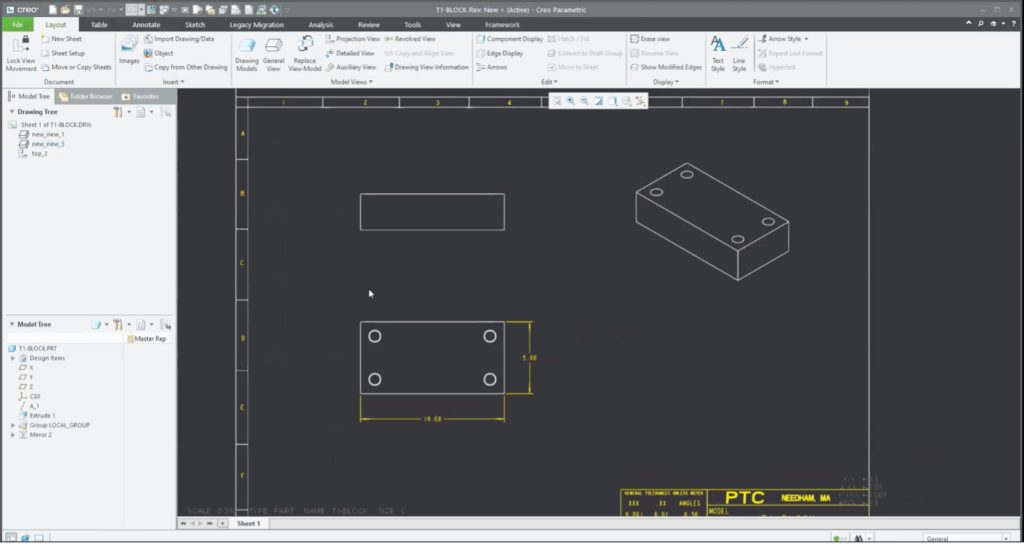
- Create an associated drawing for OBJ 1, which can include planes, dimensional information, and isometric views
- OBJ 1 gets checked into Windchill, which collects all history and changes that have occurred with each iteration as well as all associated files (drawings, CAD, etc.)
- Under the information page, all documentation is now associated with OBJ 1 and will move through the lifecycle states with it
- Once everything is associated, it can be promoted to a released state
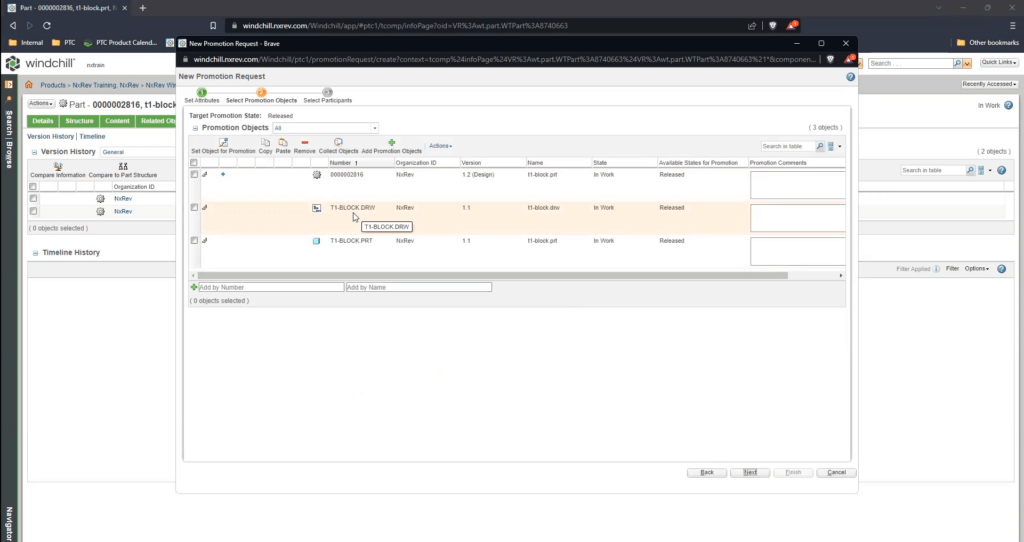
Promotion Requests
When an object’s lifecycle stage is ready to be modified and it moves on to the next stage, it’s called a promotion. Promotion objects are created and tracked in the object history. Within the promotion request workflow, approvers and reviewers can be assigned to different tasks based on their roles, and the entire process is pushed forward automatically.
The process goes as follows:
- Create a promotion request by going to “Actions” in the upper left-hand corner and selecting “new promotion request” (can also be completed from Creo)
- Add details and information as needed
- Windchill brings together all the drawings and components in their lifecycle states
- The promotion request is pushed through the associated roles and tasks
- View requests and associated objects, including who created the request and where it currently is within the promotion process
- Creo View can be used to review and verify elements of the part, including the ability to stack views together
- As tasks are completed, comments can be left and then tasks can be routed to the appropriate next process (approve, reject, or rework)
Change Notice (ECN)
Change requests are used throughout the product development process to implement any changes that are needed. The change notice workflow in Windchill is automated just like promotion requests, so tasks are automatically pushed through to users based on their defined roles. The change notice works within a closed loop so the state will automatically change based on the step, and the change notice will track the issue, solution, and delegation of work automatically. Workspaces can even be synced to ensure that the latest data and objects are available as needed.
To request a change notice:
- Initiate change notice
- Fill out description, name, and due date
- Collect all the objects that might be impacted by the changes

To work on a change notice:
- Check out the object
- Make requested updates
- Check object back in and record notes to be included in the history to determine what was changed
- The object is then automatically pushed to the next task and assigned to the next person in the workflow
The work on change notices can also be verified across associated objects to be sure that drawings and supporting documentation have been appropriately updated with any changes.
Leverage Automation with Windchill Change Management Workflows
Getting products to market on time and within budget requires all processes throughout the product development lifecycle to be streamlined. By using Windchill from PTC, your team has access to all the same product information, which improves collaboration. Teams can leverage advanced, built-in, and customizable automated workflows for change management, BOM, and more.
If you’re interested in getting started with Windchill, we recommend finding a partner, like NxRev, who can provide you with advanced installation and setup services, along with customizable training for your team. We can help you throughout the transition process and ensure you’re getting the most out of your PLM investment.
If you’re already using Windchill but are looking to get more out of it, we would be happy to set up some personalized training for your team. We can even help you with integrations into other PTC products so you can get the most out of your solutions.